
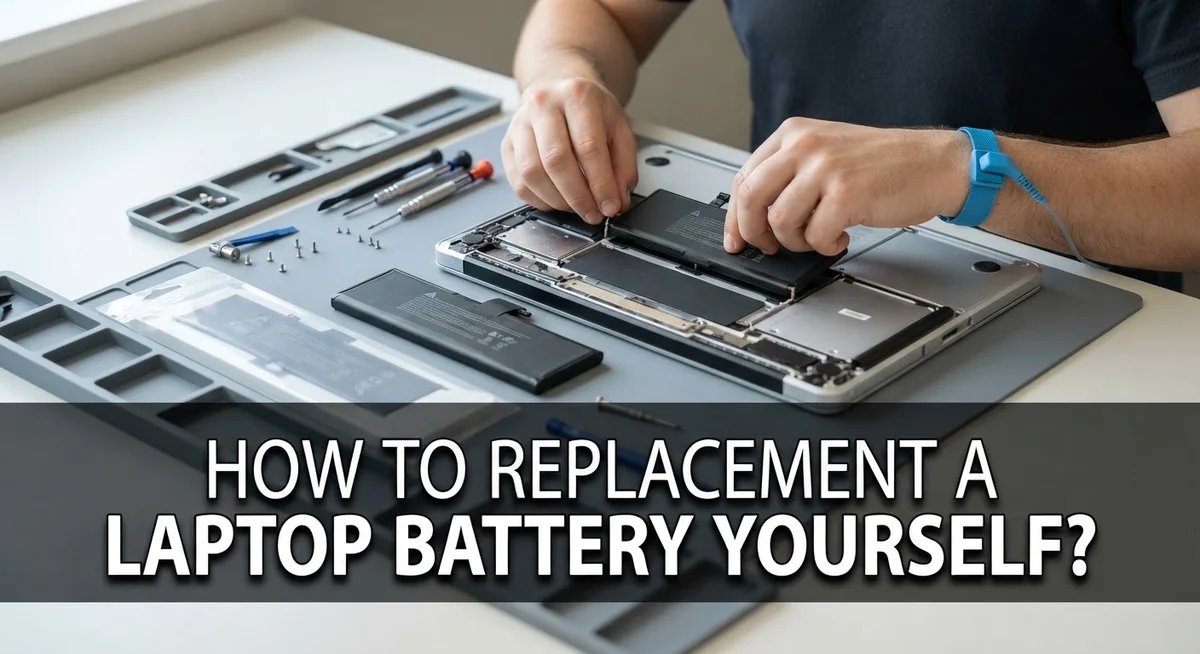
How to Replace a Laptop Battery Yourself: A Step-by-Step Guide
Is your laptop battery dying faster than it used to? You are not alone.
Many laptop users face this problem after a few years of use. The good news is that you can often fix it yourself.
Replacing a laptop battery is easier than most people think. You do not always need a technician or a repair shop visit.
This guide walks you through the entire process step by step. We will show you how to check your battery type first.
Then, you will learn how to power down your device safely. We cover removing the back panel and disconnecting the old battery too.
Every laptop model is different, so we highlight tips for popular brands like HP and Dell. You will also discover common mistakes to avoid during the swap.
Things like pinched cables or lost screws can cause big headaches. We want you to skip those problems completely.
By the end of this article, you will feel confident. You will know exactly how to restore your battery life quickly and safely.
Let’s get your laptop running like new again.
In a Nutshell
Here is a quick summary before you get started.
-
Check your battery type first. Removable batteries are great for DIY projects. Non-removable ones often need a professional’s help.
-
Power down your laptop completely. Unplug it and remove any external devices. This step keeps you and your laptop safe.
-
Open the back panel carefully. Take your time removing screws. Keep them organized so you don’t lose any.
-
Disconnect the old battery gently. Avoid pinching cables during this process. Careless handling can lead to data loss or damage.
-
Install the new battery correctly. Make sure it fits your laptop model perfectly. An incompatible battery can cause more problems.
-
Follow brand specific guides for extra help. HP and Dell laptops have unique steps. These guides make the process smoother.
With patience and attention to detail, you can restore your battery life quickly. This process reduces the risk of costly professional repairs. Soon, your laptop will feel brand new again.
Understanding Your Laptop Battery Type
Your laptop battery type determines whether you can replace it yourself. Two main categories exist: removable and non-removable batteries.
Removable batteries have a physical latch or release mechanism on the bottom of your laptop. You can see them when you flip your device over. These batteries slide out easily without opening your laptop. DIY replacement works perfectly for this type.
Non-removable batteries are glued or soldered inside your laptop. You must open the entire device to access them. This approach requires more skill and special tools. Professional service is your best option here.
Finding your battery type is simple. Check your laptop’s bottom panel first. Look for a battery compartment with a visible latch or release button. If you see one, you have a removable battery. If the bottom panel is smooth with no battery section, your battery is likely non-removable.
Your user manual provides the definitive answer. Search for your laptop model number online and download the manual as a PDF. The manual lists your battery type clearly. It also shows exactly how your battery connects inside.
Manufacturer websites offer another quick resource. Visit HP, Dell, Lenovo, or your brand’s support page. Enter your laptop model number. The site displays battery specifications and replacement instructions specific to your device.
Check your battery’s part number too. This number appears on the battery itself or in your device settings. You’ll need this number to purchase the correct replacement. An incompatible battery won’t fit properly or work correctly.
Take photos of your battery before removing it. Snap pictures showing how cables connect and where the battery sits. These photos become invaluable reference guides during installation. They help you reconnect everything correctly.
Understanding your battery type prevents wasted time and frustration. It tells you whether DIY replacement is possible for your specific laptop. This knowledge guides your next steps in the replacement process.
Tools and Preparations Needed Before You Start
Before you start replacing your laptop battery, gather the right tools. Having everything ready prevents frustration and keeps your device safe during the process.
You will need a screwdriver set with small heads. Most laptops use Phillips or flathead screws on the back panel. Check your laptop’s manual to confirm which type fits your model. A magnetic screwdriver helps prevent losing screws in tight spaces.
Get a clean, flat work surface. This could be a desk, table, or even a large cutting board. A soft cloth or towel protects your laptop from scratches during the replacement.
Prepare an anti-static wrist strap or mat. These items prevent electrical discharge that can damage internal components. If you don’t have either, simply touch a metal part of your laptop frame before handling the battery to discharge static electricity.
Keep your laptop’s user manual nearby. This guide shows exactly where screws are located and how to safely remove the back panel. If you don’t have the physical manual, download it from the manufacturer’s website.
Have a container ready for screws. Small bowls or cups work perfectly. Label each container if your laptop has multiple screw types, so you install the correct ones in the right spots.
Ensure good lighting in your work area. Bright light helps you see small components clearly and prevents accidental damage. A desk lamp or headlamp works well for this task.
Turn off your device completely and unplug all cables. Wait at least five minutes before opening the back panel. This cooling period reduces the risk of electrical shock and allows internal components to discharge safely.
Remove any external devices like USB drives, headphones, or external hard drives. These items can get in your way or accidentally get damaged during the replacement process.
Have your replacement battery within reach. Verify it matches your laptop’s model number before you begin any work.
Step-by-Step Guide to Replacing Your Laptop Battery
Before you begin the replacement process, take time to prepare your workspace properly. A clean, organized area prevents accidents and keeps small components from getting lost.
Start by shutting down your laptop completely. Don’t just close the lid or put it in sleep mode. Wait a few minutes after shutdown to let the system cool down completely. This cooling period protects both you and your device from heat-related injuries.
Unplug the power adapter from your laptop. Remove any USB devices, external hard drives, or peripherals connected to your system. These items can get in your way or accidentally get damaged during the battery replacement process.
Gather all necessary tools before opening your laptop. You will need a screwdriver set with small, precision heads. Different screws require different sizes, so having multiple options prevents stripping or damaging screw heads. Place all screws in a small container as you remove them. Losing even one screw can cause problems when reassembling your laptop.
Set up your work surface on a clean, flat table or desk. Remove clutter and make sure you have plenty of space to work comfortably. Good lighting is essential for seeing small components clearly. Position a lamp or work light near your laptop so you can see exactly what you’re doing.
Consider using an anti-static wrist strap if you have one available. This strap prevents electrical discharge that can damage sensitive internal components. If you don’t have a strap, simply touch a metal part of your laptop frame occasionally to discharge static electricity safely.
Keep your laptop’s user manual nearby during the entire process. The manual contains specific instructions for your exact model and may show you where components are located. Having this reference guide available helps you avoid mistakes and work more efficiently throughout the replacement.
Manufacturer-Specific Considerations (HP, Dell, and Others)
Different laptop manufacturers design their devices with unique internal layouts. This means the battery replacement process varies between HP, Dell, Lenovo, Asus, and other brands. Understanding your specific manufacturer’s approach saves you time and prevents mistakes.
HP laptops often have batteries located near the back of the device. Most HP models require you to remove the entire bottom panel to access the battery compartment. The battery typically sits in a plastic cradle with two connector tabs. You disconnect these tabs first before sliding the battery out. HP’s user manual clearly shows the exact screw locations and removal sequence.
Dell laptops frequently position batteries in the center or front section of the chassis. Many Dell models use a simple pull tab system. You locate the tab, pull it gently, and the battery slides out smoothly. Some newer Dell devices have batteries secured with a single screw. Always check your specific model number on Dell’s support website for exact instructions.
Lenovo laptops usually feature batteries with a latch mechanism on one end. You push or slide this latch, and the battery pops up at an angle. This design makes removal easier than some competitors. The connector cable attaches at the top of the battery compartment.
Asus devices often use compact battery designs integrated into tight spaces. You may need to remove additional components like the keyboard or palm rest first. This adds complexity but remains manageable with patience.
The critical step across all manufacturers is disconnecting the battery connector before physically removing the battery. This prevents electrical damage to your motherboard. Always consult your manufacturer’s specific guide before starting work. Visit the manufacturer’s support website and search for your exact model number. Download the service manual or battery replacement guide. These documents contain photos showing your exact device’s internal layout. Following manufacturer instructions reduces damage risk significantly and ensures you complete the job correctly.
Common Mistakes to Avoid During Replacement
Replacing a laptop battery yourself requires careful attention. Many people make mistakes that damage their device or create safety hazards. Learning what to avoid protects both your laptop and your investment.
Pinching cables is one of the most common errors. When you remove the battery, cables sit close to the extraction point. You must pull the battery straight out and away from these connections. Moving it at an angle or rushing the removal can crush delicate wires. Damaged cables often cause component failures that cost far more than a new battery.
Losing screws happens more often than you’d think. Small fasteners are easy to misplace during the removal process. Use a container or small dish to hold every screw you remove. Label the container with the screw size or location. This simple step prevents confusion when reassembling your laptop.
Selecting an incompatible battery creates serious problems. Check your laptop model number and battery specifications before purchasing a replacement. An incorrect battery may not fit properly, could fail to charge, or might damage your device’s charging system. Your manufacturer’s documentation lists the exact battery type you need.
Improper cable disconnection can break connectors permanently. Always disconnect battery cables gently and straight outward. Never twist or bend connectors at odd angles. Some laptops have clips or latches holding cables in place. Release these mechanisms before pulling cables free.
Careless handling during the process leads to data loss or component damage. Avoid touching internal circuits with bare hands. Static electricity from your body can destroy sensitive electronics. Keep liquids away from your work area completely. One spill ruins everything inside your laptop.
Take your time throughout the replacement. Rushing causes most accidents. Work slowly, follow your manual carefully, and double check each step. Your patience prevents costly mistakes and ensures a successful battery replacement.
Troubleshooting After Installing a New Battery
After you install your new battery, several issues might appear. The good news is most problems have simple fixes.
Your laptop may not recognize the new battery right away. This happens because the system needs time to detect the component. Leave your laptop powered on for 10 to 15 minutes. The operating system will run a hardware scan automatically. If the battery still doesn’t appear, restart your laptop completely. Power it down fully, wait 30 seconds, then turn it back on.
Your new battery might show a low charge percentage even though you just installed it. This is normal behavior. Plug in your power adapter and let the battery charge for at least 2 hours. The system recalibrates during this initial charge cycle. Avoid using your laptop while it charges for the first time.
Sometimes the battery drains faster than expected. Check your power settings in your operating system. High performance modes consume more power. Switch to a balanced or power saver mode to test battery life. Also review which programs run in the background. Unnecessary applications drain your battery quickly.
If your laptop shuts down suddenly despite showing charge, the battery connector may not be fully seated. Power down immediately and reseat the connector. Open your laptop again and ensure the battery cable clicks into place firmly.
Heat buildup during charging indicates a potential problem. The battery should feel warm but not hot. If it becomes very hot, disconnect the power adapter immediately and let it cool. Excessive heat suggests an incompatible battery or internal damage.
Your laptop might not power on at all after replacement. Check that the battery connector is properly attached. Verify you selected the correct battery model for your laptop. If problems persist after these checks, you may need professional assistance to examine internal components.
Tips for Extending the Life of Your New Battery
Your new battery needs proper care to perform well for years. Start with correct charging habits from day one. Charge your battery fully before using your laptop for the first time. Let it reach 100 percent, then use it until it drops to around 20 percent before charging again.
Avoid keeping your laptop plugged in constantly. Continuous charging generates heat that damages battery cells over time. Unplug your device once it reaches full charge. This simple step extends your battery’s overall lifespan significantly.
Keep your laptop cool during use. Heat is the enemy of battery longevity. Make sure air vents stay clear and unblocked. Place your laptop on hard, flat surfaces rather than soft ones like beds or couches. Soft surfaces trap heat underneath your device.
Close unnecessary programs running in the background. Extra applications drain your battery faster and create heat buildup. Reduce screen brightness when you don’t need full brightness. Dimmer screens consume less power and help your battery last longer between charges.
Avoid extreme temperatures in your environment. Don’t leave your laptop in hot cars or freezing rooms. Room temperature storage keeps batteries healthy. If you won’t use your laptop for several weeks, store it with a charge level around 50 percent rather than completely full or empty.
Check your battery health occasionally using your laptop’s built in tools. Most operating systems provide battery reports showing current capacity. If you notice significant capacity loss, your battery may need replacement sooner than expected.
Update your laptop drivers and operating system regularly. Software updates often include battery optimization improvements. These updates help your new battery work more efficiently.
Finally, avoid dropping your laptop or exposing it to physical damage. Internal battery connections can loosen from impacts, causing performance problems. Treat your device gently to protect both your new battery and other components.
Final Thoughts
Replacing a laptop battery yourself is a manageable task when you follow the right steps. You do not need special training to do this job well.
The process starts with identifying your battery type. From there, you power down your laptop and remove the back panel carefully.
Removable batteries make this job simple for most people. Non-removable batteries need professional help since they require more technical disassembly.
Your success depends on patience and attention to detail. Rushing through any step increases your chance of making mistakes.
Manufacturer guides help you understand your specific laptop model. HP, Dell, and other brands have unique designs that affect how you approach the replacement.
Once you finish the installation, your laptop should work like new again. A fresh battery gives you better performance and longer usage time between charges.
This project saves you money compared to professional repair services. You also learn a valuable skill that helps you in the future.
Confidence grows each time you complete a repair task on your own. Small projects like this build your technical knowledge over time.
Remember that safety comes first during any repair. Always disconnect power sources and handle components with care.
Your new battery deserves proper installation from the start. Taking time now prevents problems later on.
The satisfaction of fixing your own device is worth the effort. You gain independence from repair shops and their schedules.
Every laptop model presents slightly different challenges. Stay patient and follow instructions specific to your device.
With the right approach, you can extend your laptop’s life significantly. A new battery often makes an old laptop feel functional again.
Trust the process and take your time with each step. Your careful work today gives you reliable performance tomorrow.
Frequently Asked Questions
Can I replace my laptop battery myself?
Yes, you can replace it yourself if your laptop has a removable battery. Many modern laptops have non-removable batteries sealed inside. Check your laptop’s manual or manufacturer website to confirm your battery type. If it’s removable, the process is straightforward. Non-removable batteries require professional service at a repair center.
What tools do I need for battery replacement?
You need very few tools. A small screwdriver (usually Phillips head) works for most laptops. Keep a container nearby to store screws safely. Some people use an anti-static wrist strap to prevent electrical damage. That’s honestly all you need to get started.
What’s the biggest mistake people make?
The most common error is pinching cables while removing the battery. These wires connect to your motherboard and break easily. Remove the battery slowly and carefully. Another frequent mistake is losing screws during removal. Use a small dish to keep all screws organized and together.
How do I know if my replacement battery is compatible?
Check your original battery’s model number. You’ll find this on a label attached to the battery itself. Compare this number with your replacement battery before installation. Your laptop’s manual also lists compatible battery models. Buying an incompatible battery wastes money and won’t work in your device.
Should I calibrate my new battery after installation?
Yes, calibration helps your laptop recognize the battery accurately. After installation, charge your battery to 100 percent without interruption. Then let it drain completely until your laptop powers off. Charge it back to 100 percent again. This process trains your system to read the battery correctly.

Dillip is the founder and editor of ImageScaleLab.com, a passionate tech enthusiast who loves breaking down complex gadgets and accessories into simple, honest reviews and buying guides. With years of hands-on experience exploring the latest in tech, he is dedicated to helping readers make smarter, more confident purchasing decisions.


