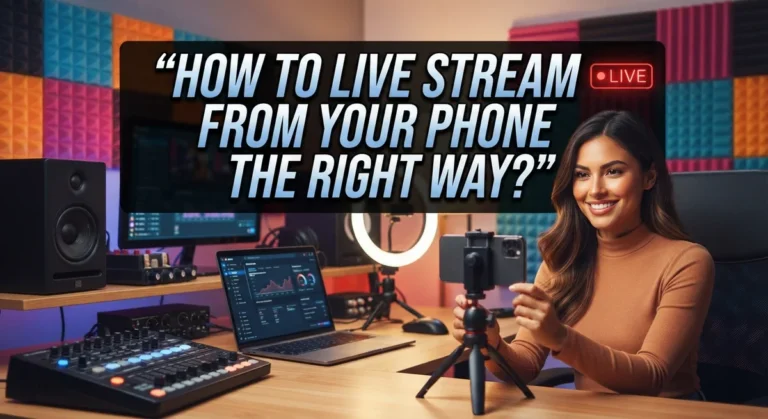
How to Improve Your Lighting for Video Meetings: A Complete Guide
Do you look tired or blurry on video calls? Bad lighting is often the real problem, not your webcam.
Most people rely on overhead ceiling lights during meetings. This creates harsh shadows under your eyes and nose. Your face loses definition, and colleagues struggle to see your expressions clearly.
The good news is that fixing this takes little effort. Small changes in light placement can transform how you appear on screen.
This guide covers simple, budget-friendly ways to upgrade your video lighting. You will learn why directional task lighting beats ceiling lights every time.
We also explain the ideal color temperature for natural looking skin tones. You will discover how bouncing light off walls creates soft, flattering results.
Plus, we cover common mistakes that make people look washed out or shadowy. Small adjustments, like angling your light five degrees, can make a big difference.
By the end, you will know exactly how to set up lighting that makes you look sharp and professional. No expensive equipment needed, just smart placement and a few easy tweaks anyone can do at home.
In a Nutshell
Here is the quick rundown for better video lighting:
-
Skip the ceiling lights. Overhead lighting creates harsh shadows on your face. Switch to a desk lamp or small light source instead.
-
Position lights above eye level. This angle gives your face natural, flattering shadows. It also helps define your features clearly on camera.
-
Bounce light off walls. Direct light feels harsh and overexposed. Aiming your light at a nearby wall creates a soft, even glow instead.
-
Check your color temperature. Aim for 5000 to 6000°K for natural looking skin tones. This range avoids the orange or blue tint that cheap lighting causes.
-
Make small adjustments. Tilt your light 5 to 10 degrees if shadows still appear. Small tweaks often fix blur or uneven lighting fast.
-
Watch for glare. If you wear glasses, tilt them slightly to avoid reflections. This simple trick keeps your eyes visible and clear.
These steps take minutes to set up. You do not need expensive gear. Just smart placement and the right light temperature make a real difference on camera.
Why Good Lighting Matters for Video Calls
Good lighting changes how you appear on camera. Your face becomes clearer, sharper, and more professional. Poor lighting does the opposite. It makes you look tired, blurry, or washed out.
Why does lighting matter so much? Your webcam captures light, not reality. When light is weak or positioned wrong, the camera struggles to focus. It compensates by adding blur or noise to the image. You end up looking unfocused even though your internet connection is fine.
Overhead ceiling lights seem convenient, but they create problems. Light from above casts dark shadows under your eyes and chin. This makes your face look gaunt or tired. The camera also picks up uneven brightness across your face.
Better lighting improves video quality instantly. Proper directional light shows your face clearly. Your skin tone looks natural. Your eyes appear bright and engaged. Viewers can see your expressions better, which helps communication.
Professional appearance matters in work calls. Studies show that people form opinions within seconds of seeing you. Good lighting helps you make a positive first impression. It signals that you take the meeting seriously.
Lighting also affects how the camera performs. Modern webcams work better with sufficient light. The camera’s autofocus locks onto your face faster. Color accuracy improves. You look more natural instead of oversaturated or too dark.
The setup requires no special skills or expensive equipment. You likely have desk lamps or other light sources already at home. Small adjustments to their position and angle create dramatic improvements.
The time investment is minimal. Most people spend 5 to 10 minutes arranging their lighting. After that, every video call benefits. You get better results without any ongoing effort.
Bad lighting wastes your professional presence. Good lighting costs almost nothing but pays dividends in how others perceive you on screen.
Understanding Light Types: Overhead vs. Task Lighting
Overhead ceiling lights and task lighting work very differently for video calls. Understanding these differences helps you choose the right approach for your setup.
Overhead lighting creates problems for video meetings. Ceiling lights hang above you and cast shadows downward onto your face. Your eyes appear darker. Your cheekbones look less defined. The camera struggles to capture your features clearly. Overhead lights also create a washed out appearance because the light comes from directly above rather than from the sides.
Task lighting gives you much better control. A desk lamp or small light positioned near your workspace lets you direct light exactly where you need it. You can adjust the angle. You can move it closer or farther away. This flexibility means you can eliminate unflattering shadows and brighten your face evenly.
The key difference is direction. Overhead lights shine down on everyone in a room equally. Task lighting targets one specific area, which is perfect for video calls since your camera only sees you.
Position task lighting above eye level for the best results. Light coming from slightly above creates natural shadows that define your face without making you look harsh. Avoid placing lights directly in front of your face. Direct light feels too intense and overexposed on camera.
Bounce task lighting off walls instead of shining it directly at you. When light reflects off a wall first, it becomes soft and diffused. This creates a gentle, professional appearance. Direct light feels too strong and creates glare on your skin.
Color temperature matters too. Task lights in the 5000 to 6000°K range produce natural looking skin tones. Warmer lights below 4000°K make you look orange or yellow. Cooler lights above 6500°K appear too blue.
The practical takeaway: turn off overhead lights and use task lighting positioned above eye level, bounced off walls when possible.
Step-by-Step: Setting Up Your Lighting for Video Meetings
Start by gathering what you already have at home. A simple desk lamp works perfectly for video meetings. You don’t need expensive equipment to look good on camera.
Position your light source above your eye level. This placement creates soft shadows that look natural and flattering. The light should sit roughly 12 to 18 inches above where your eyes appear on screen.
Next, aim your light at a nearby wall instead of directly at your face. When light bounces off the wall, it becomes soft and diffused. Direct light feels harsh and overexposed in video calls. This reflection technique takes seconds but makes a huge difference in how you appear.
Turn off your overhead ceiling lights completely. Many people think ceiling lights help, but they actually work against you. Overhead lighting casts unflattering shadows downward and makes your face look uneven on camera.
Check the color temperature of your light. Look for lights that produce 5000 to 6000 Kelvin. This range matches natural daylight and makes your skin tone look healthy and balanced. Most modern lights display their Kelvin rating on the packaging or manual.
Make small adjustments to your light angle if shadows still appear under your eyes or chin. Tilt the light 5 to 10 degrees and check how you look on your next test call. Small movements create noticeable improvements.
If you wear glasses, tilt them slightly to prevent reflections from bouncing back into the camera. This simple fix eliminates distracting glare during important meetings.
The entire setup process takes about 5 to 10 minutes. Test your lighting by joining a video call and reviewing how you appear. Your camera will capture much clearer video once you have proper directional lighting in place.
Getting the Angle Right: Positioning Lights Above Eye Level
Getting the angle right makes a huge difference in how you look on camera. Light positioned above eye level creates natural shadows that define your face. This angle mimics how professional photographers light portraits, and it works the same way for video calls.
When you place your light source too low, shadows appear under your eyes and chin. These shadows make you look tired or unflattering. Moving your light higher eliminates this problem instantly.
Aim your light at a wall rather than directly at your face. Direct light is too harsh and causes glare on your skin. When light bounces off a wall first, it becomes soft and diffused. This reflected light spreads evenly across your face and looks much more professional.
The ideal setup positions your light about 2 to 3 feet away from you, angled downward at roughly 45 degrees. This angle provides enough brightness without creating harsh shadows. Your face appears clear and well defined.
Start by adjusting your current light source higher than your eye level. If you use a desk lamp, raise it or tilt it upward. If you use a ring light, position it above your monitor. Small adjustments matter here.
Once your light is higher, redirect it toward the wall behind your monitor or to the side. Step back and check your video preview on your meeting platform. Look for shadows under your eyes or dark areas on your face.
If shadows still appear, move your light slightly higher or adjust the angle a few more degrees. The goal is even brightness across your face with soft, natural looking shadows. This positioning works for everyone, regardless of your face shape or skin tone.
Most people find the right angle within just a few minutes of testing different positions.
Color Temperature Explained: Choosing the Right Glow
Color temperature measures how warm or cool light appears. It’s measured in Kelvin units, ranging from warm yellow tones to cool blue tones. Understanding this helps you look your best on camera.
Warm light falls between 2700K and 3000K. This light has a yellow or orange glow. It feels cozy and relaxing but can make your skin look washed out or tired on video calls.
Cool light ranges from 5000K to 6500K. This light has a blue or white appearance. It mimics natural daylight and is ideal for video meetings because it shows your face clearly and naturally.
The optimal range for video meetings is 5000 to 6000 Kelvin. This temperature range flatters most skin tones and helps your camera capture accurate colors. Your face appears vibrant and alert without looking artificial.
Most overhead ceiling lights fall into the warm category around 2700K to 3000K. That’s why they don’t work well for video calls. Task lighting often comes in cooler temperatures, making it better for your appearance on screen.
You can check your light’s color temperature by looking at the bulb packaging or specifications. Many modern lights display this information clearly. If your current light doesn’t specify the temperature, you can estimate it by observing the color it produces.
Mismatched color temperatures create problems. If half your face gets warm light and half gets cool light, the camera struggles to balance the colors. This makes you look uneven or discolored on screen.
Consistency matters more than perfection. All your lights should match the same color temperature. This creates a uniform, professional appearance throughout your video call.
Adjusting color temperature is simple. Replace your bulbs with ones rated at 5000 to 6000K. Many affordable options exist that fit standard light fixtures. Your camera will immediately show the improvement in how your face appears.
Common Lighting Mistakes and How to Avoid Them
Many people make simple lighting mistakes without realizing it. These errors hurt how you appear on camera during video meetings.
The biggest mistake is relying only on overhead ceiling lights. These lights shine down from above your head. They create harsh shadows under your eyes and chin. Your face looks tired and unflattering on screen. Ceiling lights alone don’t give you the control you need.
Another common error is positioning light too close to your face. Direct light at close range causes glare. It washes out your skin tone. The camera struggles to focus properly. Your video quality becomes blurry and unclear.
Many people ignore color temperature completely. Mismatched light colors make you look sick or washed out. If your light is too warm (orange tinted), you appear sickly. If it’s too cool (blue tinted), you look cold and unfriendly. Consistency in color temperature matters more than you think.
Poor positioning creates unflattering shadows. Lights placed at the wrong angle cast shadows across your face. These shadows hide your features. They make you hard to see clearly on camera. Your colleagues struggle to read your expressions.
To avoid these mistakes, use task lighting instead of ceiling lights. Position your light above eye level. Bounce it off a wall rather than shining it directly at you. Check that your light falls in the 5000 to 6000 Kelvin range. Make small angle adjustments until shadows disappear.
Test your setup before important meetings. Turn on your video camera. Look at yourself on screen. Check for shadows under your eyes and chin. Adjust your light angle slightly if needed. This takes only a few minutes but makes a huge difference.
Troubleshooting Blurry or Washed-Out Video
Blurry or washed out video often stems from inadequate lighting rather than camera problems. When your lighting is poor, your webcam struggles to focus properly, resulting in a fuzzy image. The solution involves fixing your light setup.
Start by turning off your overhead ceiling lights. These lights come from above and create unflattering shadows on your face. They also produce inconsistent color temperatures that make video appear dull. Replace ceiling light with directional task lighting instead.
Position a desk lamp or small light source above your eye level. Angle it downward at approximately 45 degrees. This placement creates natural looking shadows and improves facial definition. Never shine light directly at your face, as this causes glare and washes out your features.
Bounce your light off a wall instead of pointing it straight at you. Reflected light becomes softer and more flattering. It also reduces harsh shadows that blur your video quality. Adjust the angle slightly until you see improvement on your camera preview.
Check your light’s color temperature. Aim for 5000 to 6000 Kelvin for video calls. Warm lights around 2700K make video appear yellowish and unclear. Cool lights in the 5000K range produce crisp, clean video. Look at your bulb’s packaging to verify the Kelvin rating.
Distance matters too. Keep your light source about 2 to 3 feet away from you. Lights positioned too close create harsh shadows and uneven exposure. Lights too far away fail to illuminate your face properly.
Test your setup before important meetings. Open your camera app and preview how you look. Adjust the light angle if you still see blur or washed out areas. Small tweaks make significant differences in video clarity and appearance.
Final Thoughts
Good lighting changes how you show up on screen. It builds trust and keeps people focused on you, not on shadows or glare.
You don’t need fancy equipment to fix your video meeting lighting. Small changes make a big difference in how you look on camera.
Start with what you already have. A desk lamp, a window, or even a bright reading light can work well.
Placement matters more than the light itself. Raise your light source above eye level. Point it toward a wall for a soft, even glow.
Avoid harsh, direct light on your face. It creates shadows and makes your skin look uneven on camera.
Keep your color temperature in mind. Lights between 5000K and 6000K mimic natural daylight and make your video look clear and professional.
Test your setup before every important call. Sit in your usual spot and check how the light falls on your face.
Make small adjustments if needed. Moving a lamp just a few inches can change your entire appearance on screen.
Remember, consistency counts. Use the same lighting setup each time so your team recognizes a steady, familiar look.
Good lighting isn’t about perfection. It’s about clarity, comfort, and confidence during your calls.
When your lighting works well, you look more engaged and approachable. People pay attention to your words, not your shadows.
Simple tools like a small lamp or ring light can transform your video presence instantly.
Take a few minutes to adjust your lighting before your next meeting. That small effort can make you look sharper and more professional in every call.
Great lighting doesn’t require a studio setup. It just needs the right angle, the right color, and a little patience to get it right.
Frequently Asked Questions
What’s the best way to position lights for video calls?
Position your light source above eye level and aim it at a wall nearby. This bounces soft light onto your face instead of creating harsh shadows. The angle should be roughly 5 to 10 degrees from straight ahead. Higher placement creates better facial definition and makes you look more polished on screen.
Why does my video look dark even with lights on?
Overhead ceiling lights don’t work well for video meetings. They shine down from above, which creates unflattering shadows under your eyes and chin. Switch to directional task lighting like a desk lamp or small light positioned in front of you. Direct light bounced off walls gives you much better results than ambient ceiling light.
Can I reduce glare on my glasses during meetings?
Yes. Tilt your glasses slightly downward to minimize reflections. Position your light source at an angle rather than pointing straight at your face. If glare persists, adjust your light 5 to 10 degrees to the side. Test different angles before your important calls to find what works best.
How does light color temperature affect my appearance?
Light color temperature ranges from warm (yellow tones) to cool (blue tones). Aim for 5000 to 6000 degrees Kelvin for video calls. This range feels natural and keeps your skin tone looking accurate. Mismatched color temperatures make you appear either too orange or too pale. Check your bulb packaging to find the temperature rating.
Do I need expensive equipment to improve my lighting?
No. Simple solutions work great. A basic desk lamp positioned correctly beats expensive overhead lighting every time. Ring lights that clip to your monitor are affordable starter options. The key is placement, not price. Focus on positioning your light above eye level and bouncing it off walls for soft, flattering results.

Dillip is the founder and editor of ImageScaleLab.com, a passionate tech enthusiast who loves breaking down complex gadgets and accessories into simple, honest reviews and buying guides. With years of hands-on experience exploring the latest in tech, he is dedicated to helping readers make smarter, more confident purchasing decisions.