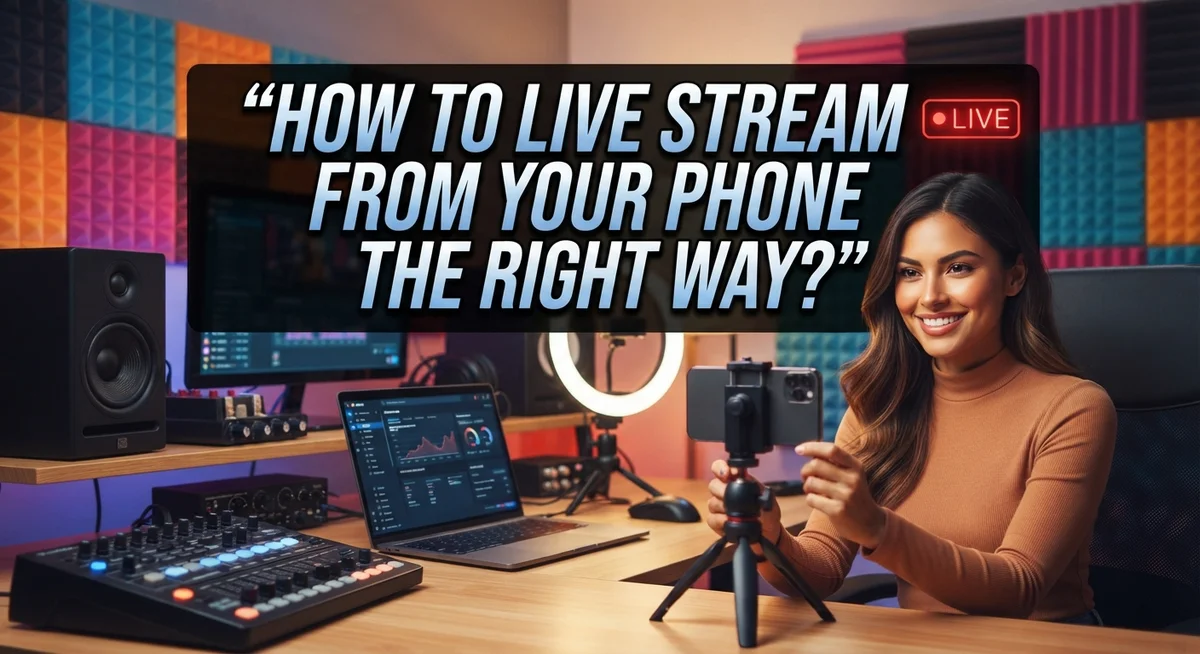
How to Live Stream From Your Phone the Right Way
Your phone can turn into a powerful broadcasting tool in seconds. But going live without a plan often leads to shaky video and muffled sound. That is not the experience you want for your viewers.
Live streaming from your phone is easier than most people think. You just need the right setup and a bit of know how. This guide breaks down every step so you can stream with confidence.
We will cover the four basic components every live stream needs. You will learn how to pick a streaming method that fits your goals. We also walk through logging into platforms like YouTube or StreamYard and scheduling your broadcast.
Lighting, camera angles, and audio quality can make or break a stream. So we will show you simple ways to fix all three. You will also discover the most common mistakes people make and how to avoid them.
By the end, you will know how to test your setup, troubleshoot connection issues, and go live the right way. No guesswork. Just clear steps that help you stream smoothly from your phone.
In a Nutshell
Here’s a quick recap before you go live.
-
Pick your platform first. Log into apps like YouTube or StreamYard and set up your broadcast before doing anything else.
-
Light matters more than you think. Face a window or light source so your audience can actually see you clearly.
-
Sound quality can make or break your stream. Always test your microphone and check levels so audio doesn’t clip or distort.
-
Check your camera angle. Set up your ideal shot before you start streaming, not after.
-
Internet connection is everything. A weak signal can ruin an otherwise perfect stream, so test it first.
-
Never skip the test run. Testing your equipment beforehand saves you from awkward surprises once you’re live.
-
Know your platform’s flow. Whether it’s YouTube’s Calendar feature or StreamYard’s broadcast setup, understanding the steps keeps things smooth.
Getting these basics right means fewer mistakes and a more professional looking stream. Small preparations now lead to big improvements later. Your phone has everything you need. You just have to use it correctly.
What You Need Before You Go Live
Before you hit that live button, gather everything you need. Your phone is the main tool, but several other items matter just as much.
First, check your internet connection. A strong WiFi signal or mobile data plan keeps your stream running smoothly. If WiFi feels slow, move closer to your router. You can also switch between WiFi and mobile data to find the faster option.
Next, look at your lighting setup. Natural light from a window works best. Position yourself so light hits your face directly. Avoid sitting with your back to the light source, as this creates dark shadows on your face. If natural light isn’t available, use a lamp or overhead light positioned in front of you.
Audio equipment comes next. Your phone’s built in microphone works, but a separate microphone gives you clearer sound. Test your audio levels before going live. Audio clipping happens when sound is too loud, so keep levels moderate. Wear headphones during your test run to catch any issues.
Consider your camera angle too. Place your phone at eye level or slightly above. This angle looks more professional than shooting from below. Use a phone stand or prop to keep your device steady.
Finally, check your streaming platform. Log into YouTube, StreamYard, or whichever app you chose. Create or schedule your broadcast. Adjust all settings like privacy permissions and broadcast title before you start.
Test everything once more before going live. Run through your audio, video, and internet connection. This simple step prevents embarrassing problems when your audience is watching.
Choosing the Right Streaming Platform and App
Your streaming platform choice shapes your entire broadcast experience. Different platforms serve different audiences and offer unique features for mobile broadcasters.
YouTube remains the most popular option for phone streaming. The YouTube app lets you create live streams directly from your device. You can schedule broadcasts in advance, set privacy levels, and reach millions of potential viewers. The platform handles technical details well, making it beginner friendly.
StreamYard offers another solid choice for mobile streaming. This platform focuses on professional looking broadcasts without requiring expensive equipment. You can add graphics, switch between camera angles, and invite guests to join your stream. Setup takes just a few minutes on your phone.
Facebook Live works great if your audience already hangs out there. Many communities prefer Facebook for live content. The app integrates smoothly with your existing profile and pages.
Instagram Live suits creators with smaller, more intimate audiences. This platform works best for casual, personal content rather than large scale broadcasts.
When choosing your platform, consider where your audience spends time. Ask yourself a few questions. Do your viewers prefer YouTube? Are they on Facebook? Does your community use Instagram? Your answer determines which app you should use.
Most platforms require you to log in before going live. Once logged in, look for the “Create” or “Go Live” button. These buttons launch your broadcast setup screen. From there, you configure your broadcast title, description, and privacy settings.
Test the app on your phone before your actual broadcast. Familiarity with the interface prevents mistakes when you’re live. Spend five minutes exploring menus and buttons. This small step pays huge dividends once your stream starts.
Step-by-Step: Setting Up and Scheduling Your Broadcast
Starting your broadcast begins with accessing your chosen platform. Open the app and log in with your account credentials. This gives you access to all the broadcasting tools you need.
Next, find the option to create or schedule your broadcast. Most platforms place this in a menu labeled “Create,” “Go Live,” or “New Broadcast.” Click this button to start the setup process.
You’ll see a form asking for broadcast details. Fill in your title, description, and any relevant information about your stream. Keep your title clear and specific so viewers know what to expect.
Configure your broadcast settings before going live. Choose whether your stream should be public, private, or available only to specific people. Set permissions for who can comment or interact during your broadcast.
If you’re scheduling your stream for later, select your preferred date and time. This lets your audience know when to tune in. Many platforms send automatic reminders to followers about upcoming broadcasts.
Now focus on your physical setup. Position your phone so the camera captures your face clearly. Place a window or light source in front of you, not behind you. This prevents your face from appearing dark or shadowed.
Test your audio by recording a short sample. Speak at your normal volume and listen back. Adjust your microphone settings if the sound seems too quiet or too loud.
Check your internet connection by running a quick speed test. A stable connection prevents buffering and disconnections during your stream.
Take a final look at your camera angle and lighting. Make any adjustments needed. Once everything looks and sounds good, you’re ready to begin your broadcast with confidence.
Perfecting Lighting, Camera Angle, and Framing
Natural light is your best friend when streaming from your phone. Position yourself near a window so light falls directly on your face. This eliminates harsh shadows and makes you look professional without extra equipment.
Avoid backlighting at all costs. If light comes from behind you, your face appears dark and unclear. Your viewers won’t see you properly. Instead, face the light source so it illuminates your features evenly.
If natural light isn’t available, use soft, diffused artificial lighting. Point lights at walls or ceilings rather than directly at your face. This creates even illumination across your entire face and body.
Your camera angle matters just as much as lighting. Position your phone at eye level or slightly above. This angle is flattering and makes you appear confident and engaged with your audience.
Avoid pointing your camera downward. This creates unflattering shadows under your chin and nose. It also makes viewers feel like they’re looking up at you, which feels awkward.
Frame yourself in the center of your screen with some headroom above your head. Don’t cut off the top of your head or position yourself too far to one side. Leave enough space so viewers see your shoulders and upper body clearly.
Test your setup before going live. Record a short sample video and watch it back. Check if your face is well lit, your angle looks natural, and your framing feels balanced. Adjust your phone position, move your light source, or reposition your body until everything looks right.
These simple adjustments transform your stream quality immediately. Good lighting and framing make you look professional and keep viewers engaged throughout your broadcast.
Getting Clear Audio Every Time
Clear audio makes or breaks your live stream. Poor sound drives viewers away faster than anything else. You need to focus on three main areas: microphone placement, audio levels, and background noise control.
Position your microphone correctly. Keep your phone’s built in microphone close to your mouth, roughly 6 to 12 inches away. This captures your voice clearly without picking up every room sound. If you’re using an external microphone, place it even closer for the best results.
Check your audio levels before you go live. Most streaming apps show a volume meter in their settings. Watch this meter as you speak at normal volume. Your audio should stay in the green zone, never hitting the red. Red means clipping, which creates distorted, unpleasant sound that ruins your stream.
Test your microphone with a recording. Use your phone’s voice memo app to record 30 seconds of yourself talking. Play it back and listen carefully. Does your voice sound clear? Can you hear background noise like fans, traffic, or typing? Adjust your setup until the recording sounds good.
Reduce background noise by choosing a quiet space. Close windows and doors. Turn off fans, music, and notifications. Ask people nearby to stay quiet during your broadcast.
Use headphones during your stream. Wearing headphones lets you hear exactly what your viewers hear. You’ll catch audio problems instantly and fix them before they ruin your broadcast.
These steps ensure your audience hears you clearly. Clear audio keeps people watching and engaged throughout your entire stream.
Testing Your Setup Before You Hit Go Live
Before you press that live button, run through a complete equipment check. This step saves you from embarrassing technical failures during your broadcast.
Start by opening your streaming app and creating a test broadcast. Don’t publish it to your audience yet. Instead, set it to private or unlisted mode so only you can see it. This gives you a safe space to experiment without pressure.
Record a short sample video using your phone’s camera. Watch it back immediately. Pay close attention to how you look on screen. Check if your face is well lit and centered. Notice if your background is distracting or professional enough for your audience.
Next, test your internet connection. Use a speed test app to check your upload speed. Live streaming typically needs at least 2.5 Mbps for reliable quality. If your connection feels weak, move closer to your WiFi router or switch to mobile data to see which performs better.
Test your audio thoroughly. Use your phone’s voice memo app to record yourself speaking for 30 seconds. Listen back and check for these issues: Is your voice clear? Does audio clip or sound distorted? Can you hear background noise like fans, traffic, or typing?
Adjust your microphone position if needed. Keep your phone’s built in microphone between 6 to 12 inches from your mouth. This distance prevents audio clipping while capturing your voice clearly.
Finally, do a full dress rehearsal. Sit in your streaming position. Turn on all your lighting. Speak as you would during the actual broadcast. Record this practice session and review it one more time. This final check catches problems before your real audience arrives.
Common Mistakes That Ruin Mobile Live Streams
Poor audio quality ruins more streams than anything else. Your viewers tolerate bad video, but bad sound makes them leave immediately. Many streamers ignore this critical element and regret it.
Weak internet connections cause constant buffering and disconnections. Your phone needs stable WiFi or strong mobile data. If your signal drops, your stream freezes or ends abruptly. Viewers get frustrated and stop watching.
Not positioning your phone correctly leads to awkward camera angles. Holding your phone too low makes your chin look huge. Tilting it too high shows your ceiling instead of your face. Find a stable position at eye level before you start.
Ignoring your surroundings creates distracting backdrops. Messy rooms, clutter, or busy patterns pull attention away from you. Choose a clean, simple background that looks professional.
Failing to test your equipment beforehand causes live disasters. You might discover your microphone doesn’t work after you go live. Your camera might be blurry or your lighting too dark. Testing takes just five minutes and prevents embarrassment.
Audio clipping happens when your microphone levels are too high. Your voice sounds distorted and harsh. Adjust your levels in your app settings before streaming.
Streaming with low battery drains your phone mid broadcast. Your stream cuts off suddenly and your viewers are left hanging. Charge your phone fully and keep it plugged in during your stream.
Poor internet speed causes pixelated, choppy video. Your viewers see constant freezing and quality drops. Check your connection speed and move closer to your router if needed.
Starting without a plan leaves you awkward and silent. You fumble for words and lose your audience’s attention. Write down key talking points beforehand.
Troubleshooting Connection and Technical Issues
When your live stream stutters or cuts out, connection problems are usually the culprit. Your internet strength directly affects video quality and stream stability. Weak connections cause pixelation, buffering, and sudden disconnections that frustrate your viewers.
Start by checking your signal strength. Move closer to your WiFi router if you’re using wireless internet. Physical distance weakens your connection significantly. If you’re still experiencing issues, try switching between WiFi and mobile data to see which performs better.
Consider your location carefully. Walls, metal objects, and other devices drain WiFi signals. Find an open space with a clear line to your router. Some venues offer dedicated networks for streaming. Ask staff if a separate network exists for better performance.
Test your connection speed before going live. Most streaming platforms require minimum speeds to function properly. If your speed falls below requirements, your stream will struggle. You can run a quick speed test using your phone’s browser.
Audio problems often accompany connection issues. When bandwidth drops, your phone prioritizes video over audio. This creates choppy sound or complete audio loss. Ensure adequate headroom in your audio settings to prevent this problem.
Close unnecessary apps running in the background. These drain your bandwidth and processing power. Background apps consume resources your stream needs. Disable automatic updates and cloud syncing temporarily during broadcasts.
If problems persist, restart your phone completely. This clears temporary glitches and refreshes your connection. Power off your device, wait 30 seconds, then restart it. This simple step resolves many technical issues quickly.
Monitor your phone’s performance throughout your stream. Keep an eye on your connection indicator. If signal weakens, pause briefly and let your phone stabilize before continuing.
Final Thoughts
Live streaming from your phone does not need to feel hard. You now know the basic steps that make a stream look and sound professional.
Good lighting makes a huge difference. Face a window or bright light source before you start. This simple trick instantly improves your video quality.
Audio quality matters just as much as video. Viewers will forgive a shaky shot, but they will leave if they cannot hear you clearly. Always test your microphone first.
A strong internet connection keeps your stream smooth. Check your signal, close background apps, and have a backup plan ready. This prevents frustrating disconnections during your broadcast.
Testing your setup before going live saves you from surprises. Run a quick practice stream to check your camera angle, lighting, and sound. Fix any issues before your real audience arrives.
Remember the common mistakes to avoid. Poor audio, bad lighting, and weak connections cause most streaming problems. A little preparation goes a long way.
Whether you use the YouTube app or StreamYard, the core process stays the same. Log in, schedule your broadcast, adjust your settings, and check your gear. These steps apply no matter which platform you choose.
Live streaming gets easier with practice. Each stream teaches you something new about your setup and your style. Do not worry about making it perfect on your first try.
Start simple, stay consistent, and keep improving. Your phone already has everything you need to create engaging content. Now it is time to press that live button and share your voice with the world.
Frequently Asked Questions
What are the four basic components I need to stream from my phone?
You need a smartphone, a streaming platform, good lighting, and a reliable internet connection. Your phone has the camera and microphone built in. The streaming platform (like YouTube or StreamYard) is where your broadcast goes live. Lighting ensures viewers see you clearly. Internet speed keeps your stream smooth and stable.
How do I schedule a live stream on YouTube?
Open the YouTube app and tap Create. Select Live. Choose Calendar and pick your date and time. Add your stream title and description. Configure your privacy settings (public, unlisted, or private). Allow the app to access your camera and microphone. You can start the broadcast when you’re ready.
What should I do before pressing the live button?
Test your audio first. Speak into your microphone and check the levels. Adjust your phone’s position so the camera captures your face or content properly. Position yourself near a window for natural light. Close any apps running in the background. Check your internet connection speed. Do a quick video and audio test to catch any issues early.
Why does my audio sound distorted during streams?
Audio clipping happens when your microphone levels are too high. Your phone’s microphone picks up sound too loudly and distorts. Lower your microphone input levels in your app settings. Keep adequate headroom so peaks don’t clip. Speak at a normal volume from a reasonable distance. Test your audio levels before going live to prevent this problem.
How do I fix constant buffering during my broadcast?
Move closer to your WiFi router or switch to mobile data. Check your internet speed before streaming. Close unnecessary background apps that use bandwidth. If problems continue, restart your phone. Consider using a dedicated network if you’re in a venue. Monitor your connection throughout the stream and adjust your location if needed.

Dillip is the founder and editor of ImageScaleLab.com, a passionate tech enthusiast who loves breaking down complex gadgets and accessories into simple, honest reviews and buying guides. With years of hands-on experience exploring the latest in tech, he is dedicated to helping readers make smarter, more confident purchasing decisions.