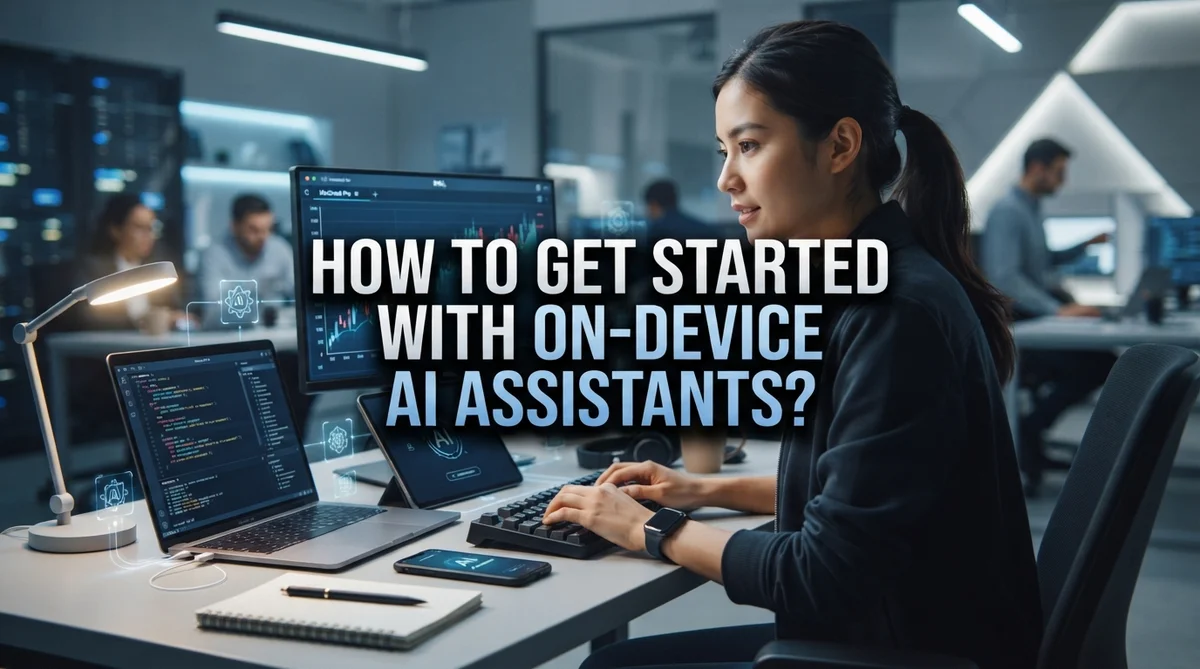
How to Get Started With On-Device AI Assistants?
Imagine an AI assistant that works for you without sending your data to the cloud. That is exactly what on-device AI assistants offer.
They run locally on your own hardware. This means faster responses and better privacy for you.
More people want smart assistants that respect their data. On-device AI gives you that control.
You can connect these assistants to your email, calendar, or Notion. They can even understand voice, text, and images at the same time.
This guide will show you how to start with on-device AI assistants. We will cover the basic setup using tools like Ollama and Open WebUI.
You will also learn how to link your assistant to platforms like Telegram or n8n. These tools help you build simple, useful workflows.
We will share tips to keep your setup simple. You will also learn common mistakes to avoid early on.
By the end, you will know how to build a personal AI assistant. It will run locally, protect your privacy, and help you daily.
Let’s get started and explore how on-device AI can work for you.
In a Nutshell
Here is a quick recap of what you need to know:
-
Local setup first: Install Ollama and Open WebUI to run AI models on your own device. This keeps your data private and fast.
-
Pick an integration platform: Tools like Telegram and n8n help your assistant talk to other apps. Start simple with just one platform.
-
Connect your data sources: Link your assistant to email, calendar, or Notion. This lets it fetch real information and act on it.
-
Enable multimodal support: Many local models handle voice, vision, and text together. Turn on these features once your basic setup works.
-
Avoid doing too much at once: Add one integration at a time. This prevents confusion and technical errors.
-
Run it around the clock: Once stable, let your assistant operate 24/7. It can then support you anytime without extra effort.
-
Stick to free tools: Open source options keep your setup budget friendly. You get powerful features without ongoing costs.
Follow these steps in order, and your on-device AI assistant will feel simple, private, and genuinely useful.
What Are On-Device AI Assistants and How Do They Work?
On-device AI assistants are intelligent programs that run directly on your computer or phone. They process information locally without sending your data to cloud servers. This means your conversations stay private and under your control.
How they work is straightforward. These assistants use AI models stored on your device. When you ask a question or give a command, the model processes it right there. No internet request needs to travel to a distant server and back. Your response comes faster and your privacy stays intact.
These assistants handle multiple types of input. You can talk to them using your voice. You can show them images for analysis. You can type text messages. Many systems support all three methods at once, which experts call multimodal capability.
The real power comes from integration. Your on-device assistant can connect to your email inbox. It can check your calendar for availability. It can read your notes in productivity apps. These connections let the assistant understand your context and help you more effectively.
The setup process involves installing AI models on your local machine. You choose which model to run based on your device’s power. Smaller models work on phones and older computers. Larger models need more processing power but offer better results.
What makes this different from cloud AI is control. You decide which data the assistant accesses. You manage how it operates. You choose when to upgrade or change settings. The assistant becomes truly yours, not a service you rent.
This approach works best when you start simple. Begin with basic functions first. Add more features gradually as you get comfortable. This prevents overwhelming yourself with too many options at once.
Setting Up Your Local Environment with Ollama and Open WebUI
Getting your local environment ready is the first real step. You need two main components to run AI models on your own machine. The first component handles the actual AI models. The second component gives you a user interface to interact with everything.
Start by installing the model runner on your computer. This software downloads and executes AI models locally. Your machine becomes a small server that processes requests without sending data anywhere. Installation takes just a few minutes on most systems.
Next, set up the web interface. This gives you a clean dashboard to chat with your AI assistant. You can access it through your browser like any normal website. The interface lets you manage models, adjust settings, and see your chat history all in one place.
Make sure your computer has enough resources. AI models need decent processing power and storage space. Check your available disk space before downloading models. Most systems work fine, but older machines might run slower.
Create a dedicated folder for your setup. Keep your models, configuration files, and data organized in one location. This makes troubleshooting easier later.
Start with one small model first. Don’t try to run multiple large models at once. A smaller model helps you understand how everything works. You can always add more models after you get comfortable.
Test the basic setup before adding integrations. Make sure you can chat with your assistant smoothly. Check that responses come back quickly enough for your needs.
Once everything runs well locally, you’re ready to connect external tools. This foundation keeps everything stable as you expand.
Choosing an Integration Platform: n8n vs Telegram
When you’re ready to connect your local AI assistant to the outside world, you need a bridge. That’s where integration platforms come in. Two popular choices exist: n8n and Telegram. Each serves different needs.
Telegram works best if you want simplicity. It’s a messaging app that lets your assistant respond directly in chat. You send a message, your local AI processes it, and you get an answer back. The setup takes minutes. No coding required. Your assistant becomes accessible anywhere you have Telegram installed.
n8n takes a different approach. It’s a workflow automation platform. Think of it as a control center that connects many apps together. Your assistant can read emails, update calendars, save notes to Notion, and more. n8n lets you build these connections visually without writing code.
Here’s the practical difference: Choose Telegram if you want quick conversations with your AI. Choose n8n if you need your assistant to interact with multiple tools simultaneously.
Start with what feels natural to you. If you spend most time in messaging apps, Telegram makes sense. If you work across many platforms like email and project management tools, n8n fits better.
Both platforms support your local models. Neither requires sending data to the cloud. Your information stays on your device and your network.
Many people start with Telegram because it’s faster to set up. Later, they add n8n for more complex tasks. You don’t have to choose just one. You can use both platforms together once you understand how each works.
Connecting Your Assistant to Data Sources and Productivity Tools
Connecting your on-device AI assistant to data sources means linking it to the information it needs. Your assistant works best when it can access your emails, calendar events, and files. This connection happens through APIs, which are bridges between different applications.
Start by identifying which data sources matter most to you. Do you want your assistant to read your calendar? Check your email? Access notes from your productivity app? Pick one or two sources first. Adding too many at once creates confusion and errors.
Your integration platform handles these connections. It receives requests from your assistant and pulls data from your chosen sources. The platform then sends this information back to your AI model for processing.
Set up authentication carefully. Most data sources require permission before sharing information. You’ll typically generate a special key or token that proves your assistant has access rights. Store these securely and never share them publicly.
Test each connection individually before combining them. Connect your calendar first. Verify it works. Then add email. This step by step approach helps you spot problems quickly.
Real time processing matters for productivity tools. Your assistant should access current calendar information, not yesterday’s schedule. Configure your integration platform to fetch fresh data regularly.
Start with simple connections like reading only permissions. Don’t attempt complex tasks like automatically deleting emails initially. Build confidence with basic operations first.
Document your setup as you go. Write down which data sources connect to which tools. This helps you troubleshoot later and makes adjustments easier.
Once your connections work smoothly, your local AI assistant becomes genuinely useful. It understands your schedule, knows your email patterns, and can answer questions based on your actual data.
Configuring Voice, Vision, and Real-Time Processing
Voice, vision, and real-time processing turn your local AI assistant into a truly responsive tool. Let’s break down how to set each one up.
Voice Configuration starts with audio input settings. Your system needs to recognize when you’re speaking. Most local setups use open-source speech-to-text engines that run entirely on your machine. This means no audio leaves your computer. You’ll need to specify which microphone to use and set sensitivity levels. Higher sensitivity picks up quieter voices. Lower sensitivity reduces background noise interference. Test different levels to find what works best in your environment.
Vision Processing requires image recognition capabilities. Your local AI can analyze photos, screenshots, and documents when you configure this properly. The setup involves loading a vision model alongside your text model. Your computer needs extra RAM for this feature. Start by testing with simple images before moving to complex tasks. Vision works best when you keep images clear and well-lit.
Real-Time Processing means your assistant responds instantly without delays. This depends on your hardware and model size. Smaller models process faster than larger ones. You can adjust processing speed in your configuration settings. Real-time matters most when connecting to productivity tools like email and calendars. Your assistant needs to check these sources frequently and respond quickly.
Configure one capability at a time. Test voice first, then add vision, then enable real-time features. This approach prevents confusion about which part isn’t working. Document each setting you change. Keep detailed notes about what works in your specific setup. Your configuration will be unique to your hardware and needs.
Best Practices for a Smooth, Cost-Efficient Setup
Starting with on-device AI assistants works best when you follow a simple roadmap. Begin by assessing your actual needs before diving into setup. Ask yourself what tasks you want your assistant to handle daily. This clarity prevents wasted time on unnecessary features.
Your first step involves preparing your local environment. You need a computer with enough storage and RAM to run AI models. Most modern laptops work fine for this purpose. Start with smaller models that consume less power. You can upgrade to larger models later once you understand how everything works.
Keep your initial setup minimal and focused. Avoid the common mistake of connecting too many integrations at the start. Pick one data source or tool to connect first. Test it thoroughly before adding anything else. This approach saves you from troubleshooting multiple problems simultaneously.
Document everything as you build your setup. Write down which models you installed, which connections you created, and how you configured them. This documentation becomes invaluable when something stops working or when you want to replicate your setup elsewhere.
Use free and open source tools exclusively for cost efficiency. These options provide full functionality without subscription fees. They also give you complete control over your data and how your assistant operates.
Enable continuous operation once your setup runs smoothly. Your assistant can work around the clock without cloud service costs. This means it processes information and learns from patterns even when you’re not actively using it.
Test everything locally first before expanding outward. Verify that your models run properly, that your connections function correctly, and that real-time processing happens without delays. Only after confirming these basics should you add more complex features.
Common Mistakes to Avoid When Getting Started
When you start with on-device AI assistants, avoiding common mistakes saves you time and frustration. The biggest error people make is overcomplicating their setup from day one.
Don’t try to do everything at once. Many beginners attempt to connect multiple integrations, configure voice and vision capabilities, and link several data sources simultaneously. This approach overwhelms your system and makes troubleshooting nearly impossible. Start with one simple integration instead. Get comfortable with how your local model runs before adding complexity.
Another frequent mistake involves poor authentication setup. When you connect your assistant to data sources or productivity tools, security matters. Take time to configure permissions correctly the first time. Test each connection individually before combining them together. Rushing this step creates security gaps and integration failures.
People also neglect documentation during setup. You should record what you configure as you build. Write down which models you’re using, what integrations you’ve connected, and how you configured each piece. This saves hours when something breaks or you need to troubleshoot later.
Insufficient testing is another common pitfall. Always test your setup locally first. Verify that voice input works before enabling real-time processing. Check that your assistant can read data sources before connecting multiple ones. Small tests prevent big problems.
Finally, avoid running too many features simultaneously on limited hardware. Your local device has specific resources. Voice processing, vision capabilities, and real-time responses all consume power. Enable one feature at a time and monitor your system’s performance.
These mistakes are easy to prevent. Take your time with initial setup. Build gradually. Test thoroughly. Your on-device AI assistant will work smoothly when you follow this practical approach.
Troubleshooting Common Setup Issues
When you set up an on-device AI assistant, you might run into problems. The good news is that most issues have simple fixes. Let’s walk through the common problems you’ll face.
Hardware limitations cause many setup failures. Your computer needs enough RAM and storage space. If your system struggles, close unnecessary programs first. You can also choose smaller AI models that use less power. Start with lightweight options before upgrading your hardware.
Connection problems happen frequently during integration setup. Your assistant might fail to link with email or calendar apps. Check that you’ve entered the correct API keys and credentials. Verify your internet connection works properly. Restart your local environment completely if connections drop unexpectedly.
Model loading issues stop your assistant from running. The AI model file might be corrupted or incomplete. Delete the problematic model and download it again from scratch. Make sure you have enough disk space available before redownloading.
Permission errors block your assistant from accessing files and folders. Your system might restrict what the AI can read or modify. Adjust your file permissions in your operating system settings. Grant the necessary access levels step by step.
Performance slowdowns occur when your setup runs inefficiently. Too many background processes drain your resources. Disable features you don’t use immediately. Monitor your system’s CPU and RAM usage while testing.
Authentication failures prevent your assistant from connecting to external services. Double check your usernames and passwords. Regenerate API tokens if they’ve expired. Test each connection individually before combining multiple integrations.
Start troubleshooting by checking one issue at a time. This approach saves you hours of confusion and frustration.
Final Thoughts
Getting started with on-device AI assistants does not need to feel overwhelming. You now have a clear path to follow.
Start small. Set up your local environment first. Get comfortable with tools like Ollama and Open WebUI before you add anything else.
Pick one integration platform. Telegram or n8n both work well for beginners. You don’t need both right away.
Connect one data source at a time. This keeps your setup simple. It also makes troubleshooting easier later.
Patience matters more than speed here. Many beginners rush and skip basic steps. This leads to frustration and wasted time.
Remember that free and open source tools give you everything you need. You don’t have to spend money to build a working assistant.
Test each feature before you move forward. This habit saves you hours of confusion down the road. It also helps you understand your own setup better.
Once your foundation feels solid, you can expand. Add voice capabilities. Try vision features. Connect more apps to your workflow.
Growth should happen gradually, not all at once. Your assistant will handle more tasks as you build confidence and experience.
On-device AI assistants offer real benefits. You get privacy since your data stays local. You avoid ongoing cloud fees. You gain full control over how your assistant works.
The setup process rewards those who stay organized and patient. Document your steps. Keep your configuration simple. Build one piece at a time.
Your assistant will grow stronger with each addition you make. Start today, and let your setup improve gradually over time. Simple steps lead to lasting results.
Frequently Asked Questions
What exactly is an on-device AI assistant?
An on-device AI assistant runs directly on your computer or phone. It does not send your data to cloud servers. You control everything locally. This means your information stays private. The assistant can handle text, voice, and images all on your device.
Do I need special hardware to get started?
Most modern computers work fine for basic setups. You need enough storage space for the AI model itself. More RAM helps the assistant run faster. A regular laptop from the last few years will get you started. You do not need expensive equipment.
Can my assistant connect to my email and calendar?
Yes, absolutely. Your assistant can integrate with productivity tools. Email, calendar apps, and note taking services all work. You set up these connections through integration platforms. The assistant then accesses your data to help you stay organized. This happens locally on your device.
How do I handle voice and vision features?
Voice and image processing work on your device too. You configure these features during setup. Your assistant learns to understand spoken commands. It can also analyze images you show it. Both features run without sending data elsewhere.
What is the best way to expand my setup later?
Start simple and grow gradually. Add one integration at a time. Test each new feature before adding another. This approach prevents problems. Your assistant becomes more powerful as you add features slowly. Patience creates a better result than rushing.

Dillip is the founder and editor of ImageScaleLab.com, a passionate tech enthusiast who loves breaking down complex gadgets and accessories into simple, honest reviews and buying guides. With years of hands-on experience exploring the latest in tech, he is dedicated to helping readers make smarter, more confident purchasing decisions.